OpenCASCADE BRep Projection
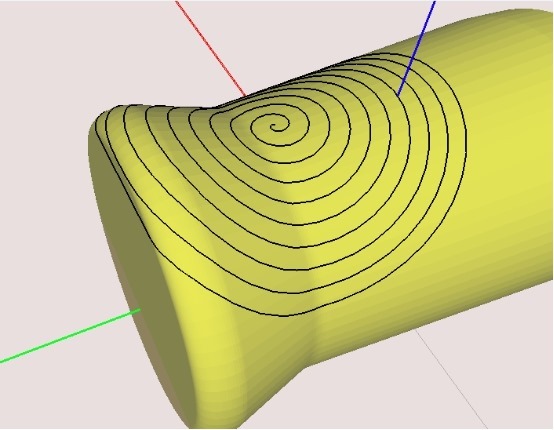
一网友发邮件问我下图所示的效果如何在OpenCASCADE中实现,我的想法是先构造出螺旋线,再将螺旋线投影到面上。
为了验证我的想法,结合原来螺旋线的造型算法,来测试下这种效果的实现。依然采用Tcl脚本在Draw Test Harness中试验。个人觉得高效使用OpenCASCADE的方法应该也是先用Tcl脚本来验证一些想法后,再根据使用到的命令找到OpenCASCADE中DRAW的命令实现,最后再可以根据DRAW中的实现,翻译成C++代码了。
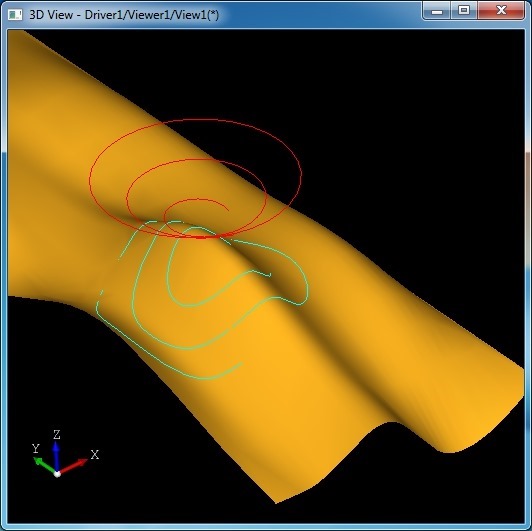
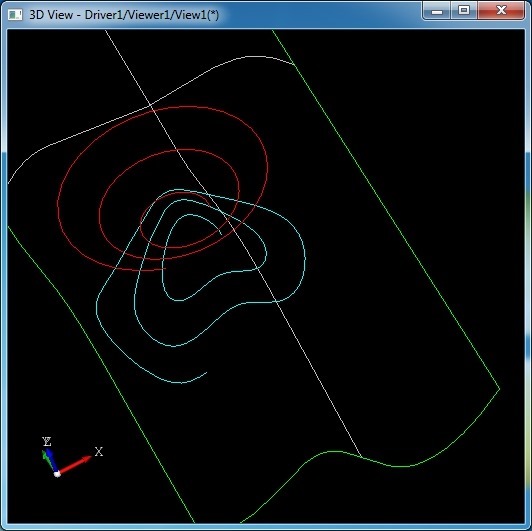
使用下列Tcl脚本生成效果和上图就很类似了,Tcl脚本代码如下所示:
#
# wrap a curve to a surface.
# Shing Liu(eryar@163.com)
# 2016-08-16 22:50
#

pload ALL

cone aCone 18*pi 2
trim aCone aCone 0 2*pi 0 2*pi

line aLine2d 0 0 2 1
trim aSegment aLine2d 0 2*pi

mkedge aHelixEdge aSegment aCone 0 6*pi

# there is no curve 3d in the pcurve edge.
mkedgecurve aHelixEdge 0.001

ttranslate aHelixEdge 10 20 10

bsplinesurf aSurface \\
5 5 0 6 1 1 4 1 5 1 8 6 \\
5 5 0 6 2 1 3 1 6 1 7 6 \\
0  0  0  1   2  0  0  1   5  0 -1  1   10  0  5  1   12  0  1  1   15  0 -3  1   16  0 -3  1   19  0 -4 1   24  0  0  1 \\
0 10  2  1   3 10  0  1   8 10  5  1   10 10  3  1   12 10  2  1   15 10  0  1   20 10  5  1   21 10  3 1   24 10  0  1 \\
0 20 10  1   4 20  4  1   7 20  4  1   10 20 20  1   12 20 10  1   16 20  4  1   19 20  4  1   20 20 10 1   24 20  0  1 \\
0 30  0  1   2 30  0  1   8 30  0  1   10 30  0  1   12 30  0  1   14 30  0  1   20 30  0  1   22 30  0 1   24 30  0  1 \\
0 40 -1  1   4 40  5  1   9 40  1  1   10 40  5  1   12 40 -1  1   16 40  5  1   21 40  1  1   22 40  5 1   24 40  0  1 \\
0 50  5  1   4 50 10  1   6 50 10  1   10 50  5  1   12 50  5  1   16 50 10  1   18 50 10  1   20 50  5 1   24 50  0  1 \\
0 60  4  1   3 60 -3  1   7 60 -4  1   10 60  4  1   12 60  4  1   15 60 -3  1   19 60 -4  1   20 60  4 1   24 60  0  1 \\
0 70 -5  1   3 70  0  1   5 70  0  1   10 70 -3  1   12 70 -5  1   15 70  0  1   17 70  0  1   20 70 -3 1   24 70  0  1 \\
0 80  7  1   3 80  1  1   7 80  3  1   10 80  0  1   12 80  7  1   15 80  1  1   19 80  3  1   21 80  0 1   24 80  0  1

mkface aFace aSurface

# use BRepProj_Projection
prj aResult aHelixEdge aFace 0 0 1

vdisplay aHelixEdge aFace aResult_1
上述代码主要使用了Draw 命令prj,找到prj的实现代码如下所示:
static Standard_Integer prj(Draw_Interpretor& di, Standard_Integer n, const char** a)
{
  char newname[255];
  if (n < 7) return 1;
  TopoDS_Shape InpLine =  DBRep::Get(a[2]);
  TopoDS_Shape InpShape = DBRep::Get(a[3]);
  Standard_Real DX=Draw::Atof(a[4]),DY=Draw::Atof(a[5]),DZ=Draw::Atof(a[6]);
  gp_Dir TD(DX,DY,DZ);
  BRepProj_Projection Prj(InpLine,InpShape,TD);
  Standard_Integer i = 1;
  char* temp = newname;


  if (Prj.IsDone()) {
    while (Prj.More()) {
      Sprintf(newname,\"%s_%d\",a[1],i);
      DBRep::Set(temp,Prj.Current());
      //cout<<newname<<\" \";
      di<<newname<<\" \";
      i++;
      Prj.Next();
    }
  }

  //cout<<endl;
  di<<\"\\n\";
  return 0;
}
如上述代码所示,主要使用了类BRepProj_Projection,此类的主要功能是将边或环向其他模型上进行圆锥和圆柱投影。
通过将边或环向其他模型投影的方式即可得到开头图片所示的效果。
PDF Version: OpenCASCADE BRep Projection
© 版权声明
文章版权归作者所有,未经允许请勿转载。
THE END


![[转]我国CAD软件产业亟待研究现状采取对策-卡核](https://www.caxkernel.com/wp-content/uploads/2024/07/frc-f080b20a9340c1a89c731029cb163f6a-212x300.png)


暂无评论内容